Let’s say you have 50 CSV files in a folder and you need to import them into a single worksheet in Excel. How do you do that?
Well, it turns out this is the simplest scenario of importing all files into Excel. The reason for this is that CSV files are flat files that are automatically appended one on top of each other using Power Query.
To follow along, download the files from this link and unzip on your computer.
Note: For this post I’m using Excel 2016. If you have Excel 2010/2013, you need to download Power Query as a separate Add-in from this link.
Follow these steps to import all CSV files in a folder
Step 1: Import all the files from the folder
Go to Data New Query From File From Folder
Click on ‘Browse’ and browse for the folder that contain the files, then click OK.
Another option (the one I generally use), is to copy the path of the folder and paste it on the folder path box.
Once you click OK, press Edit on the next window.
Then expand the content by clicking on the double arrow button ![]() .
.
Important: If the folder contains files that are not .csv, go to the filter of the extension column and select .csv.
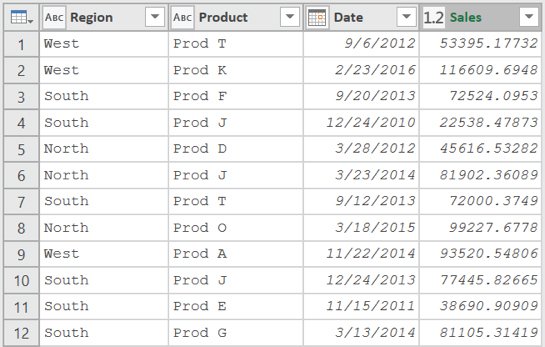
Once the data is imported it will look like this:
Step 2: Remove the headers from each file
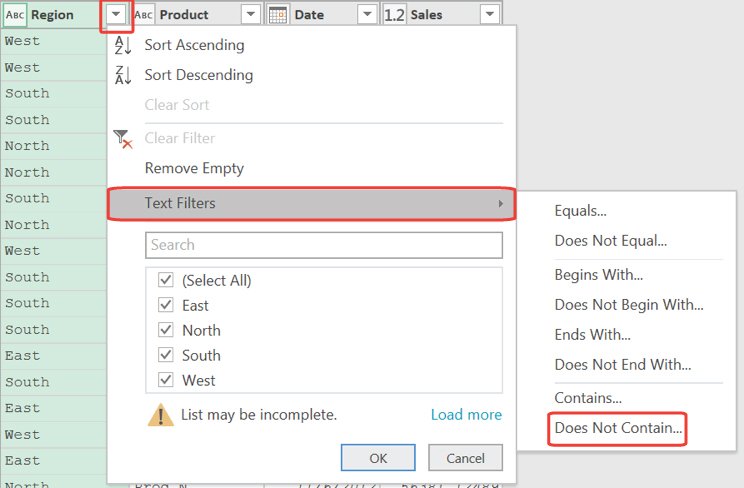
The files will be imported with the headers, so you must remove them. For this you can go to any of the columns and remove the column name from the options. For example, go to the ‘Region’ column and setup a filter to exclude the word ‘Region’.
Step 3: Load the data into Excel.
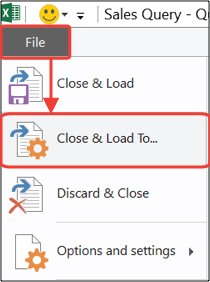
Go to File Close & Load To…
Select Table and the destination of the results (New worksheet or Existing worksheet, then click on Load.
And that’s ALL!
This is the first part of a mega post where I include all the possible scenarios of importing all files in a folder. You might face other challenges such as having dynamic starting rows or importing files with multiple worksheets.
Click below to go to the main post:
Importing all files in a folder into Excel
Please be sure to subscribe to the blog to be notified when new posts come up!!!
Please share this post so more people can benefit!
© Master Data Analysis All Rights Reserved 2024


